IT-Practice-Trainer in 3 minutes
I)
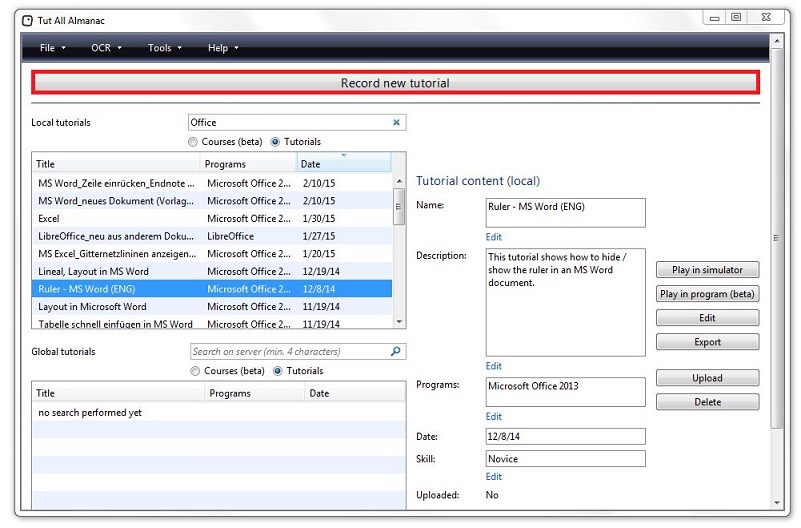
Open the program you wish to record in and start the Tut All tool. Then click on Record new tutorial.
II)
A note pops up reminding you that the program you want to record in should be opened in full screen. Click on Start recording.

The tool is now recording. -> All mouse clicks and keyboard input are being recorded in the background. Just execute the steps of the process in the software that you want to explain.
III)
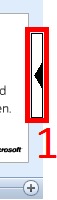
You can access the tool at all times by hovering the mouse over the rectangle shown in the bottom right corner of your screen.
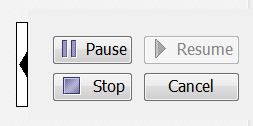
To stop recording, just click on Stop.
IV)
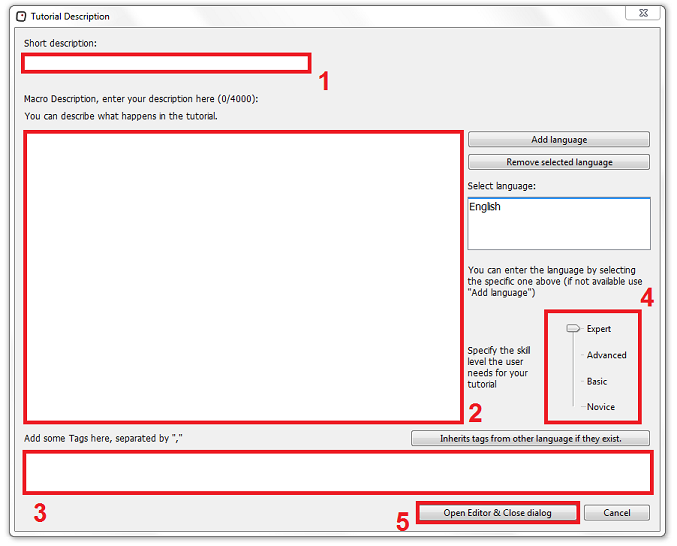
Subsequently, there is a mask to add some additional data regarding the tutorial. The fields are listed below.
- Enter a short description (a concise description / title of the tutorial)
- Detailed description (here you can describe in greater detail which areas the tutorial will cover)
- Add tags (this improves the search function)
- Choose a degree of difficulty for the tutorial
- You will be able to change this information at any time later before uploading.
Now open the editor by clicking on Open editor & close dialogue
V)
Now you enter the editor. As soon as the editor is displayed, you can edit all tutorial steps separately. You can delete steps, add text, audio, and info boxes, etc
Here you will find a detailed description of the editor which you can use as reference guide. You will find the major tools of the editor explained.
When you have completed your adjustments, close the editor via the File -> close menu.
VI)
During this step you need to fill in the program name and version of the software you created the tutorial in. Please also fill in the information that has not been entered automatically:
- Name of the program (here e.g. "Microsoft Word Starter")
- Program version, if known (here e.g. "2010")
- Language of the program
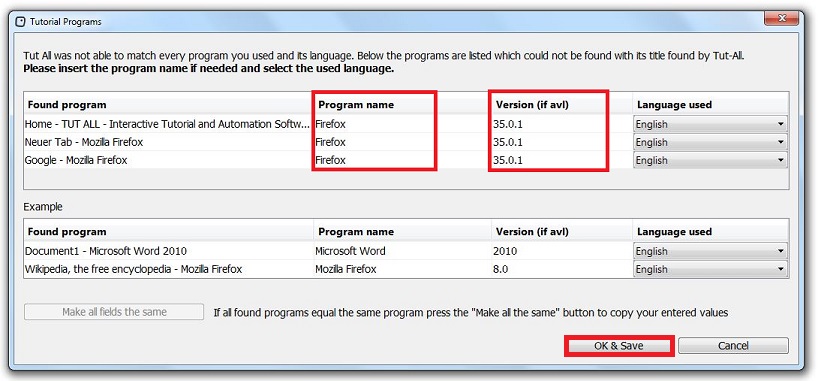
Click on Ok & Save. Finished. You have completed recording your first tutorial!
I)
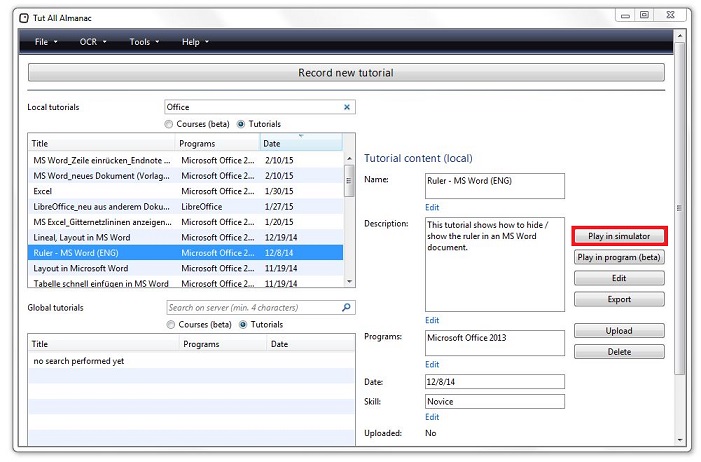
Open the tool and search for a tutorial in the list via keyword and/or by scrolling. The upper list displays the locally saved tutorials. The lower list displays the uploaded tutorials (with Almanac these would for example be saved in the Tut-All cloud). Click on Play in simulator
II)
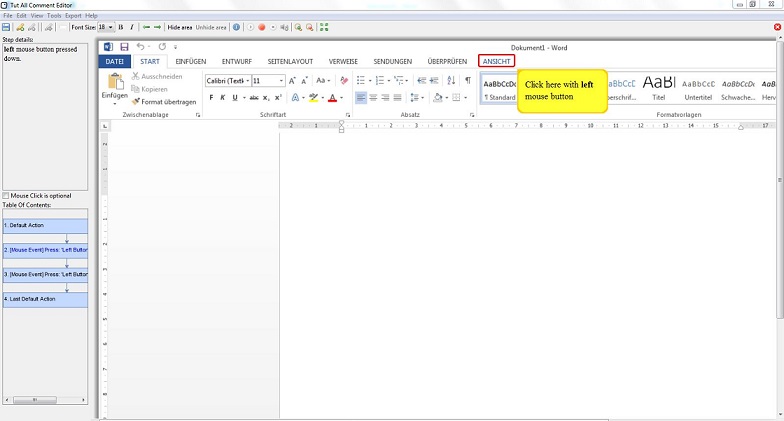
IT-Practice-Trainer will open the new screen for you automatically. You can now go through the tutorial by executing the steps described (or by clicking on the arrows above)
Execute all steps "within the program" until the Tut All interface reappears.
III):
This is the IT-Practice-Trainer in action...